Race day success hinges on more than timing chips and water stations. A well-designed start and finish line that photographs beautifully creates lasting memories, boosts social shares, and elevates your event’s brand. Discover practical ways to plan logistics that look as strong as they function.
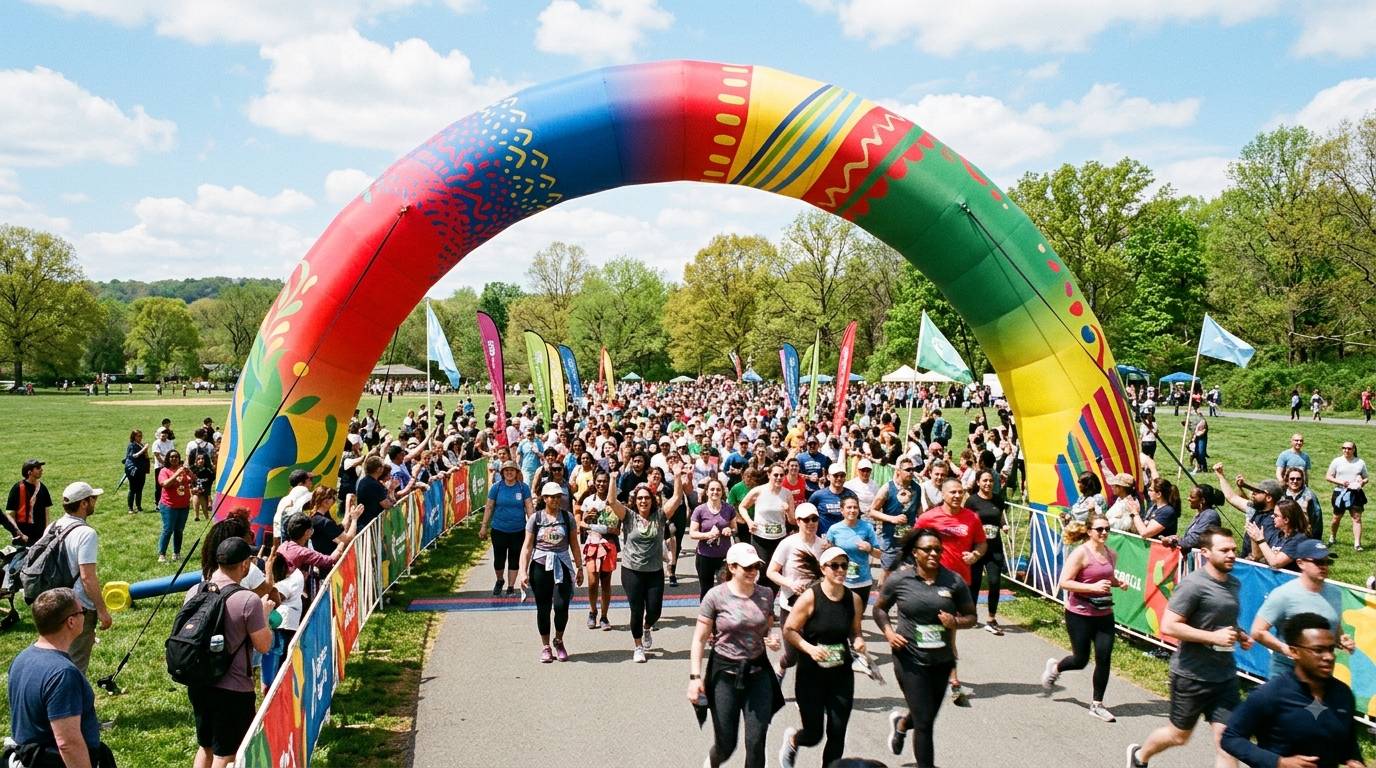
Race organizers know the first and final moments of an event stay with participants long after the medals are packed away. A start and finish line that photographs well turns ordinary race photos into powerful marketing assets. Thoughtful placement of inflatable arches instantly frames the action, guides runners, and gives photographers clean, branded shots that sponsors love. Getting the logistics right means balancing visibility, safety, crowd flow, and visual appeal so every image feels intentional and professional.
Planning the Layout for Visual Impact
The foundation of a photogenic race line begins with clear spatial planning. Position the start and finish so the background stays free of clutter. Keep power sources, vehicles, and temporary fencing outside the main camera angles. Leave enough open space in front of the line for photographers to capture runners without crowding the course.
1. Choose the right height and width
Select arches that clear the tallest participants while remaining wide enough for the expected field. A balanced proportion keeps the structure from dominating the frame or looking undersized in wide shots.
2. Align branding for camera-friendly results
Place logos and event names at eye level on the vertical legs and across the top span. High-contrast colors ensure the text remains readable even in bright sunlight or low-light finish-line moments.
3. Control traffic and sight lines
Use temporary barriers or ground markings to direct spectators away from the primary photo zones. This simple step prevents random heads and signs from appearing in every shot.
Good lighting completes the picture. Morning races benefit from soft side light that reduces harsh shadows on faces. Evening events gain drama when soft fill lights or subtle accent lighting highlight the arch without washing out the branding.
Selecting Custom Features That Enhance Photography
Custom design choices make a direct difference in how the line appears in photos. Opt for full-color branding that matches your event palette and sponsor requirements. Tubular designs offer clean lines that frame runners neatly, while more complex shapes can add visual interest without overwhelming the shot. Durable materials like high-quality PVC and nylon hold their form through weather changes, ensuring the structure looks crisp from the first runner to the last. Work with the manufacturer early to confirm size, shape, and artwork placement so the finished product supports strong images rather than competing with them.
Integrating Inflatable Structures into Race Logistics
Inflatable arches offer a practical solution that combines function and form. They inflate quickly, pack down small for transport, and provide a bold visual marker that works for both start and finish areas. Because they are made from durable PVC and nylon, they handle outdoor conditions while offering full-color branding options that match your event identity.
Secure anchoring is essential. Use ground stakes or weighted bases rated for the expected wind conditions, and check tension after inflation. Always keep the continuous-air blower in a protected, out-of-shot location so cables and equipment never enter the frame. Test the full setup the day before to confirm inflation time, stability, and how the structure appears from multiple camera positions.
Keep the area under and immediately around the arch clear of tables, bins, or volunteer stations. A clean foreground and background let the runners become the hero of every photograph while the arch delivers consistent branding in the background.
Coordinating Safety and Crowd Flow Around the Line
Safety and photography can work together when planned carefully. Place anchors and power cords where they stay hidden from cameras yet remain accessible to staff. Create clear entry and exit paths so runners move straight through the center of the arch rather than clustering at the edges. Assign volunteers to manage spectator movement and keep the immediate photo zone free of bags, signs, or extra equipment. These steps protect participants while preserving the clean visual frame that makes race images shareable and professional.
Practical Tips for Photographers and Organizers
Coordinate early with the photography team. Share the exact arch dimensions and branding layout so they can plan lens choices and shooting positions in advance. Mark preferred camera spots on the ground with discreet tape so volunteers and media stay consistent throughout the day.
Weather contingency matters. Have a plan for high winds that includes extra anchors or a quick deflation protocol. In rain, ensure the material sheds water cleanly so logos stay sharp and the structure does not look saggy in photos.
Finally, brief volunteers on the visual priorities. Simple instructions such as “keep this zone clear” or “direct finishers straight through the center” protect the clean lines that make race-day images shareable and professional.
Frequently Asked Questions
What makes an arch photograph better than temporary banners?
A three-dimensional structure creates depth and frames runners naturally, while banners often look flat and can flap in the wind.
How early should the start and finish structures be set up?
Aim for the afternoon before race day so the team can fine-tune placement, test inflation, and walk the camera angles in natural light.
Can one arch serve both start and finish?
Yes, when the course allows a single location or when two matching arches create visual consistency across the event.
What branding elements work best on camera?
Large, high-contrast logos and short event names placed at mid-height and across the top span remain readable in both close-ups and wide shots.
How do weather conditions affect the visual result?
Secure anchoring and quick-response plans keep the structure looking sharp; a well-anchored arch maintains its shape and branded appearance even in moderate wind.
Bringing It All Together
A start and finish line designed with photography in mind does more than mark the beginning and end of a race. It creates a consistent visual identity that participants remember and share. By combining smart layout planning, clean sight lines, and the strategic use of inflatable arches, organizers deliver professional images that serve both athletes and sponsors. Focus on proportion, branding placement, secure setup, and clear communication with the photography team. These practical steps turn everyday race logistics into a memorable, camera-ready experience that elevates the entire event.